How to create a circular-shaped image.
The following quotes the article linked below (by Ofnuts): https://www.gimp.org/tutorials/CircleImage/
Making a circle-shaped image
There are no circular images. There are only rectangular images. But there can be images where corners are transparent, so that only a circle shows.
In light of this:
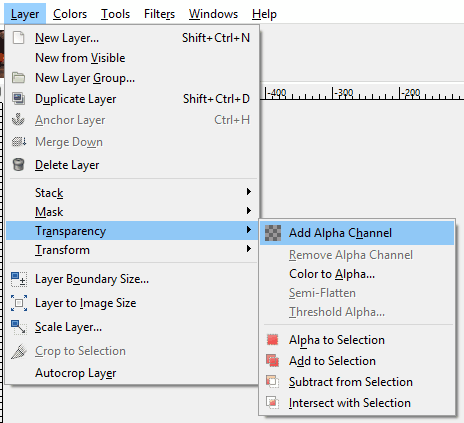
● First, make sure that your layer has an “alpha channel”.
if it’s grayed out it means you already have one
● Create a circular selection with the “Ellipse select tool” (the 2nd one in the toolbox).
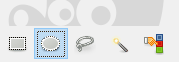
Use the “Tool options” dialog

○ If you want a true circle, use the Fixed option: select Aspect ratio and enter 1:1.
○ Depending on what kind of marks you have, you can use:
□ The diagonal framing (default): click on one corner, drag across a full diagonal and release at the opposite corner,
□ The radial framing (check Expand from center in the Tool options): click on the center, drag across a half diagonal release on a corner.
● If the selection isn’t perfect on the first try, you can move it (click around the middle) or extend it (click inside, near a border or a corner).
● Once you have the required selection, invert the selection (Select → Invert, or Ctrl-I) so that everything is selected, except your circle.
● Erase the selection (Edit → Clear or [Delete] key). You should have your central circle left, surrounded by a checkerboard pattern. (this checkerboard is not part of the image, it just indicates the transparent parts of the image).
● You can reduce the checkerboard to the minimum by auto-cropping the image (Image → Autocrop image)
● Last, save the image in a format that supports transparency, like PNG (JPEG doesn’t support transparent images…)
● If you are going to work further on the picture, save it as XCF (Gimp native format).