Asset Folders-Extending GIMP with new plug-ins, scripts, brushes, and more.
The following quotes the article linked below (by Pat David): https://www.gimp.org/tutorials/Asset_Folders/
So You Want to Install Some Assets?
GIMP allows users to include various types of assets to extend its functionality. These include common items such as brushes, patterns, palettes, fonts, Plug-Ins, and Scripts. A common question from new users is how to install these assets, so we are going to look at that here!
Finding Asset Folders
GIMP searches for these assets in locations specified in the Preferences dialog. To open it, go to:
Which will open the GIMP preferences dialog:
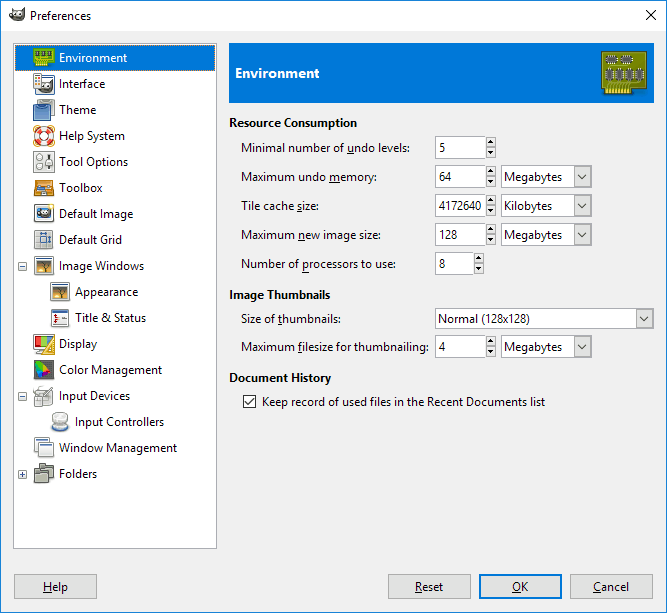
Expanding the Folders (click the “+”) in the left pane of the dialog will expose the various asset folder locations:
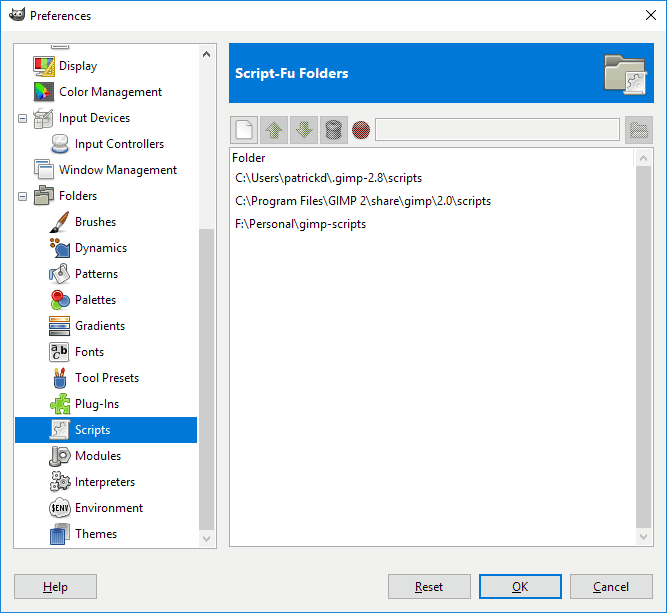
Selecting one of the options on the left will show the current paths that GIMP will search for that option. In the example above you can see that there are three locations that GIMP will search for Script-Fu scripts:
You can make scripts available (ie: install them) in GIMP by placing them in any of the listed folders.
Before you just start placing scripts in any folder you see here though, let’s think about this for a moment. The first two locations are default locations that are created by GIMP. The third entry, however, is a custom entry.
It can be very helpful to save GIMP assets to a directory outside of the default paths. In the event that you want to upgrade or try a different version of GIMP, you can simply point the appropriate folder to this location to make the assets available again. You can also use a folder as part of a file-syncing service to make scripts and assets available across different computers.
Defining Asset Folders
On the right side of the dialog there are a series of buttons that allow you to manage the folders in the list:
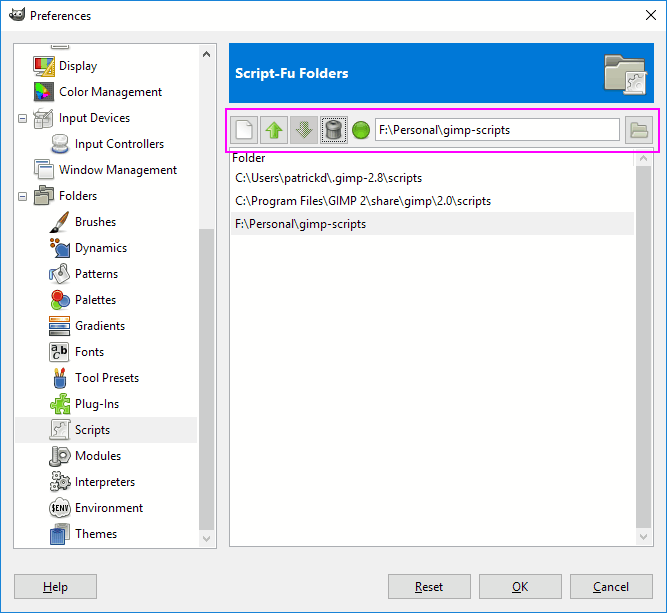
The first button is to define a new folder location to search. The second and third are to change the order that GIMP searches the folders. The fourth is to delete an entry, and the button to the far right invokes the file dialog.
To define a new location, start by pressing the first button. Then use the file chooser button on the far right to navigate your file system and find a folder you’d like to add to this list.
For example, I’ve navigated to, and chosen, the folder
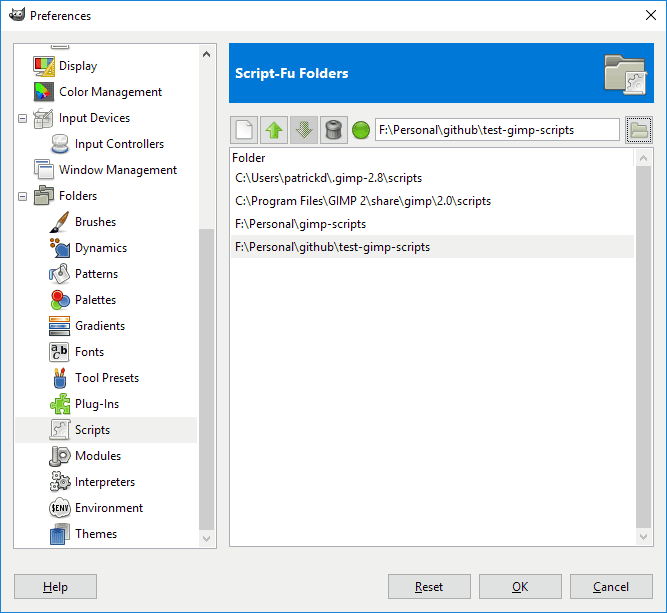
If you’re happy with your choice, you can press the OK button to save your changes. If not, you can press the Delete button to remove that entry.
In Conclusion
This is the definitive means for determining where GIMP is looking for these various assets. It will work regardless of OS and should be the default method for finding these folder locations.
TIP: If possible, consider using a separate folder to store your own assets in, and then linking to it from these dialogs.
Libre Graphics World has a more in-depth article on this topic that includes looking at installing many other assets as well. You can read it here:
GIMP add-ons: types, installation, management | Libre Graphics World